Tech Talk: Video in the World of Lighting – Part 1
Posted on April 27, 2012Written by Mike Graham, product manager for CHAUVET Professional
Now, more than ever, having elements of video in staging is really popular. If you look at successful shows like Roger Waters’ The Wall, U2’s 360 Tour, any of the WWE shows and television shows like The Voice, American Idol, or The X Factor, you can clearly see that video elements are here to stay. Follow these guidelines to gain a better understanding on why and how you should use video elements in your show:
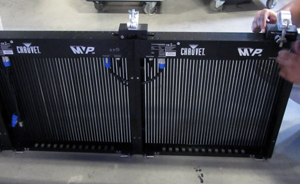 1. Build according to a scale and end result. While having video onstage is really cool, one of the tricks is to know how to use it, not overwhelming your design. Keeping an eye on the scale of your design is critical. It is really easy to let video products dominate your stage, and the key here is to know what your desired end result is. You can still use 100 MVP panels from CHAUVET Professional, but making them blend in and become part of the show can be challenging. Since video wall deign is also part of the scenic design, it is important to work closely with the scenic designer and/or the client to see what their intents are. Sometimes, they might have an idea that is not going to fly and it will be your job as the expert to steer them in the right direction. An example of this would be a client wanting to do high-resolution graphics on a lower resolution screen. It is your job to make the client understand that in order to make the video wall look like a high-resolution painting of New York City in “Death of a Salesman,” then using the MVP 37.5 may not be the answer and they will need to switch up to the MVP 18 or MVP 12. On the other hand, if you are looking to show lower resolution graphics such as monochromatic shapes, water effects, line art, or flame, then the MVP 37.5 is ideal.
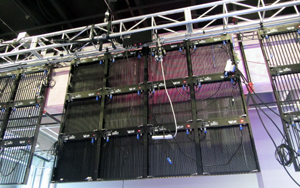 2. Incorporating video walls in your show. It is very important to know how to rig the walls into the show. Are you going to fly them, or do they need to hook into a floor support system? Perhaps, you want to bolt them directly to a wall, which is very easy with the MVP system; but you have to think of this in advance, not on the job site. If you are going to fly the panels, the easiest way to make sure that you can get your panels lined up with no off-center gaps is to hang a pipe below the truss before you hang it, or just use batten pipe in the first place. Trying to hang panels directly onto truss is a serious pain in the tail because every place you want to put a clamp, there is a truss support in your way. This is especially true when you are trying to hang a wider wall. The wider you go, the more likely you are to hit a support. For using a free-standing ground support, we suggest sections of support every four feet and mounting your clamps directly to the back of the panels. Make sure that you have enough counter balance on the floor stand. I strongly suggest using truss base plates for this method of hanging. For bolting to the wall, making connections can be tricky. You should keep a few inches of offset between the wall and the panel, which will allow you to easily make connections between panels for both control and interlocking. This will also make panel maintenance possible.
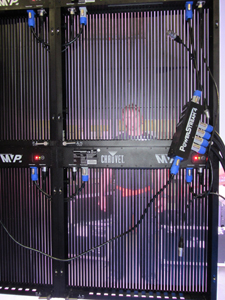 3. Addressing and controlling video panels. Now that you have decided how many panels you are going to need and how you are going to install them, it is important to think about how you are going to control them. The simple fact is that the video wall is not completely unlike any other lighting element. It needs to know where it is and what it is supposed to do. With the MVP system, we use the LED Studio software to tell the walls where they are and what they are doing. We can create multiple walls (called screens in the software) and make them in any shape that we want them to be in. Essentially, it’s like pre-visualization in lighting. We can build up the entire system before we even get to the job. In this software, we choose how many panels are in a particular screen, then we tell each panel what number it is, how many pixels it has, and how it is connected to the panels next to it. If we are doing this before the show, make sure that when you get to the show, you plug the panels in exactly how you laid them out in the software, or you are going to have a messed up looking wall. If you are doing this onsite, typically you build the show file after you set up the wall. The key here is to be consistent to how you are cabling the signal to the panels. Don’t choose to snake left to right on one set and zig-zag up and down on another. While it is not impossible to configure the software this way, it does make it much more time consuming than it needs to be, much in the way that not grouping your lights properly only leads to a long night of programming. After you have your addressing done, it’s time to make sure that your screens are all in the right place on your monitor. (I’m not going to go into screen positioning here, for that, we have manuals online and also offer training at our office if you purchase a system.)
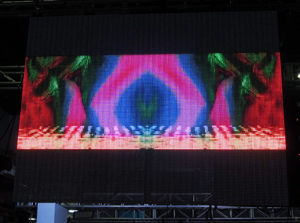 4. Display content on your video walls. So, the panels are up, configured and positioned. Now what? A good idea is to throw some content out to the screens, right? There are several ways to get content out to the screens. You can use LED Studio to put up video from any number of file extensions. It will play back anything from a .wmv file to an .avi format. This is ok if you don’t need any other control except to play a video loop over and over again. This is also fine if you are using a video processor to bring in content from a DVD, live camera, USB, or just about any other source of video you can think of. Like the man said, “If your computer monitor supports a video source, so does the video wall.” But let’s say that you need to have a lot more control over what is happening on stage. Is it possible to choose video clips as easily as rotating a prism in a moving light? Absolutely! If you are using s software package like ArKaos MediaMaster Express, it is fairly easy to control your content output right from the controller. The great thing here is that you can use anything from a super high end lighting controller like an Avolites desk or grandMA, to the most basic of fader controllers like an Obey 10. With the higher end desk, you can run Art-Net from the controller to the MVP Media Server with ArKaos MediaMaster Express installed and then treat it like any other fixture. For something simple, you can use an open source DMX to Art-Net converter and use the Obey, or just use Midi control. Assign a DMX address (or midi note) to each video clip fader and now it acts like any other fader on a lighting control desk. You can fade it in, snap it on with a bump button, program it in as part of the show, or anything else you would like to do with it. With the vast amount of parameters that are editable for each clip of content on each individual fader, you have more control over your creativity than you ever thought possible. Furthermore you can still input a camera feed from your signal processor (or any other video source) over ArKaos MediaMaster Express and again treat it like any other clip on a fader. You can still add all of the effects and positioning that you could on any other fader. As a shameless plug, I would highly recommend checking out ArKaos’ YouTube channel and see a lot more about how cool and incredibly easy to use their software is.
So now you are sitting at the front of the theatre with this video system staring back at you. Intermingled between all of those panels are Legend 412 moving head lights, COLORDash Batten TRI linear fixtures, PiXPar 24 pix battens, and COLORado Batten 144 Tour lights. Now you wonder: do I want to integrate all of this under one large pixel map and run my content over the entire set, or do I want straight DMX control and program each pixel? Or, perhaps I want both?
… See you next month
