Tech Talk: Keep Your Movers Moving
Posted on August 5, 2013Written by Mike Graham, product manager for CHAUVET Professional.
Broken lights are a nightmare. Moving lights are more so because they are complex machines that seem to never break down in an easily accessible location. Unless you have a magic wand in your toolbox, you will encounter broken moving heads somewhere in your lighting life.
An ounce of prevention:
Firstly, in order to try to keep lights from breaking, preventative maintenance is a great place to start. Developing a regular schedule of checking under the covers will help you head off problems before they come up. I typically suggest a quarterly inspection for normal usage, if you are on a tour or in a club situation, then a monthly inspection may be a better plan. A few things to check for are the following:
• Check belts. Are all of the belts tight enough and do they look worn at all? Belts should look almost like new all of the time. They should not show any signs of ripping or fraying. To make sure that they are tight enough, you should be able to twist them 90 degrees with a little force, but not much more than that. If the belt won’t turn at all, it is too tight, if it just spins to 180 degrees, it is too loose. This is a good rule to go by.
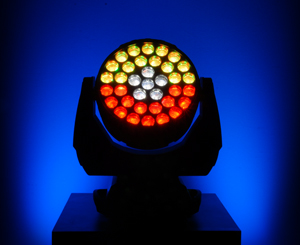 • Check fans. Are the fans clean? If not, you can use an air hose, but make sure that you are not allowing the fans to free spin with the air hose. While it sounds cool, you are causing major damage to the fan and to the driver PCB that the fan is attached to. Free spinning fans causes electrical feedback to the PCB and will damage the brushes inside the fan itself.
• Clean optics. Is there any gunk buildup on your colors, prisms, lenses, or gobos? Cleaning your optics is important because you lose a ton of light when your effects are dirty. I strongly suggest using a lint free micro fabric cloth to clean off all of these components. Also, do not spray anything onto the colors or gobos. Spray the cloth. This will help to prevent spots on your optics, and also prevent overspray into the rest of the fixture.
• Check connections. Are all of the wire harnesses properly connected? Make sure that everything is plugged in tight and that the cables are not crimped in anything.
• Clean the base. Is there any dust build up in the base? This is especially common in night clubs. Fans suck in everything from hair, to smoke, to confetti. This tends to build up on top of the power supply and main PCB. Make sure that you clean all of this garbage out of the base. This will extend the life of your power supply and main PCB greatly. Remember that these items are really expensive to replace out of warranty.
Taking the above steps will really help in extending the life of your investment.
So, it’s 6 a.m. and your coffee has not kicked in yet, but nonetheless, you are at load in. This is when you have your last chance to check your lights before you put them someplace where a problem is going to be harder to deal with. When you take the fixture out of the case, look at it. Make sure that none of the covers look out of place. Make sure that they are also on tight. Give the fixture a little shake and listen for any kind of lose items rattling around inside the fixture. Now hang it on the truss. Plug it in and run it. This is also a good time to make sure that your pan and tilt locks are off. Even if you do not have data run to the light yet, you can check the functionality of the fixture itself. Typically, if the fixture homes properly with no error codes, it is good to go, but I like to take it one step further and make sure that the lamp turns on (if it is a discharge light) and that the shutter blades open. If it is an LED fixture, run the virtual dimmer and shutter to full to make the LED come on. In both situations, you should see a bright white light and no gobos, colors, or prisms in the field. As only as you only see a bright white light, you should be in good shape. If you can add data, this is even better so that you can make sure that you can control everything. I also like to keep checking everything as the rig is going up. A ton of things can happen to your lights during their trip up to trim. Keep an eye on your gear as it moves.
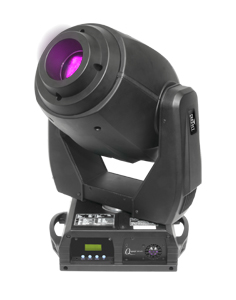 And then, the inevitable happens:
So, something broke. Now what? Typically there are symptoms of problems. For example, let’s say that you have no control from the console to the fixture, but the fixture works fine in test or stand alone mode. It could be a bad cable or a loose connection. It could also be that the fixture is in the wrong personality, the address is wrong. On the controller side, it could be a few things there as well. Did you just update firmware in your console? In that case, the personality could be wrong in the console. The patch could be messed up, Are you using Art-Net? There could be a problem in a router or your Art-Net to DMX box could be behaving badly. I like to check the micro issues before I check the macro issues. The above is the order that I would check this kind of problem. Each one is quick in of itself, but depending on your crew, could take a few minutes to check. When you find out what the problem was, write it down. Keep a log of every issue you have. Eventually, you will have a database of problem solving. When I worked on ships, I kept a log of the problems that I had in each showroom. This way, when I moved on to my next ship, the incoming lighting person would have something to start with. An entry might look something like this:
 “Aug. 16, 2001 — fixture X needed lamp replacement. When the fixture was opened, not only was the lamp bad, but the base of the lamp had shattered inside of the holder. I removed the base of the lamp and found that the porcelain in the socket was cracked as well. I replaced the lamp socket. As a tip, make sure that the brand of lamp does not change. The bi-pin base of the lamp can change slightly from manufacturer to manufacturer.”
Keeping notes like this can be tedious, but can and will save you time in the future. It also helps greatly when you are on the phone to technical support. The person you call for technical support genuinely wants to help you with your problem. They are going to ask you questions such as:
• Where are you located?
• Do you have a phone number and e-mail address to reach you?
• Are you on a show right now?
• Is the fixture still in the rig?
• What kind of controller are you using?
• What kind of power are you using?
• How many fixtures do you have power-linked together?
• How many fixtures do you have data linked together?
• Are you using an opto splitter?
• Are you using Art-Net?
Knowing the answers to the above will be really helpful. Especially if you are either on a show at that moment, or are away from your lights that you are calling about.
If you are having any kind of mechanical problem with a light, you need to unplug it from the rest of your rig immediately. Not only power, but data as well. A bad fixture can cause you data problems up or down the line. If for some odd reason there is a bad enough problem, it is possible to get a voltage spike in the data cable that can cause your opto splitter to fry, and if you don’t have an opto splitter in line, then your console is in danger. (This is why I ALWAYS have each universe of DMX isolated with an opto splitter between the console and the first fixture) If you do have a light that is down and it is 30 feet in the air, leave it there until it is safe to actually get to it. Don’t just go climbing up the truss to replace it. Keep a rope in your road box that is long enough to pull a fixture up and drop it down. I keep a pulley in my case for this as well. If something seems like a bad idea before you do it, most likely it is.
